Air chisels seem to be a love them or hate them type of tool. In our opinion they can certainly be helpful in a variety of extrication and rescue scenarios. In Part 1 of this post we will take a look at operating hazards, general operating techniques, and a homemade chisel prop to instruct students on how to use the chisel. Several videos are included for review and discussion.
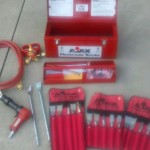 We have been fortunate to train with the Ajax Rescue Kit for the last several weeks. This chisel kit fits both 2216 PSI and 4500 PSI scba bottles. It also comes with a regulator that is adjustable from 0 to 300 PSI so the air pressure can be set appropriately for the material being cut.
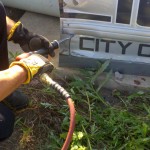
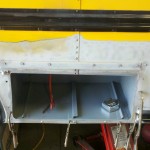 Typical air chisel used in body shops or maintenance garages don’t reach the high pressures of this one. Here’s a picture from the bus garage. They used an air chisel to remove the old rusty battery box and got the new one installed.
First Due Tackle on Facebook, Click “Like”
Operating Hazards:
- Ensure the chisel is held firmly against work surface before tool is throttled.
- Always shut off air supply, relieve hose of air pressure and disconnect tool from air supply when changing accessories.
- Wear gloves and eye protection.
- Hold the tool firmly with both hands and be ready to counteract normal or sudden movements.
- Do not pry with the blades.
- Ensure by-standers have eye protection as you can expect projectiles.
Chisel Types:
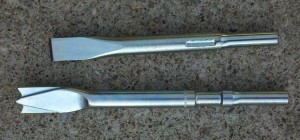
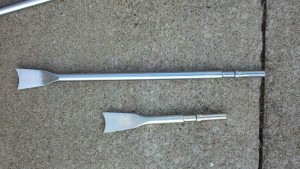
Top: Flat Chisel. Note the knotches on the shank that lock the chisel from spinning (90-125 PSI). Bottom: Double Bladed Panel Cutter. Note the smooth shank that allows the chisel to spin (90-125 PSI).
Typical Deployment Procedure:
- Thread regulator to bottle
- Connect air hose to regulator
- Connect air hammer to air hose
- Select chisel and install into retainer on air hammer
- Open air bottle
- Adjust air pressure on regulator to desired setting
*When changing bottles always bleed the air from the regulator hose. This is done by closing the valve on the bottle and then put the chisel up against something solid and pull the trigger on the air hammer to bleed the air from the regulator, hose, and hammer.
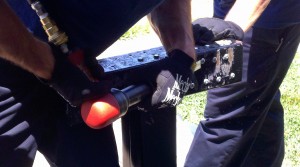
In the videos below you will see the use of the air chisel on a homemade prop that has 1/8″ reviets, 1/4″ bolts, and 1/4″ replacement school bus rivets. The plans are simple for you to make your own for teaching techniques. Just get a few pieces of scrap steel, drill holes, weld together, and then insert the rivets and bolts.
[youtube]http://youtu.be/jIuJ_peCsdo[/youtube]
[youtube]http://youtu.be/DDznaW1epaM[/youtube]
[youtube]http://youtu.be/QN3wN8NOxwc[/youtube]
 We also had some good training at a local body shop. They allowed us to practice techniques on the scrap from vehicles damaged in crashes including: door panels, hinges, and bumpers. Just so happens that one of the PD cruisers had some body work done, so the body shop owner let us cut out a souvenir for the officer (He’s ok).
In Part 2, we will show some uses for the air chisel on vehicles crash scenes.
Pass it on!
 First Due Tackle Pass It On – Firefighter, Rescue & Extrication Training
